Impulse Boards
A low-cost electric skateboard
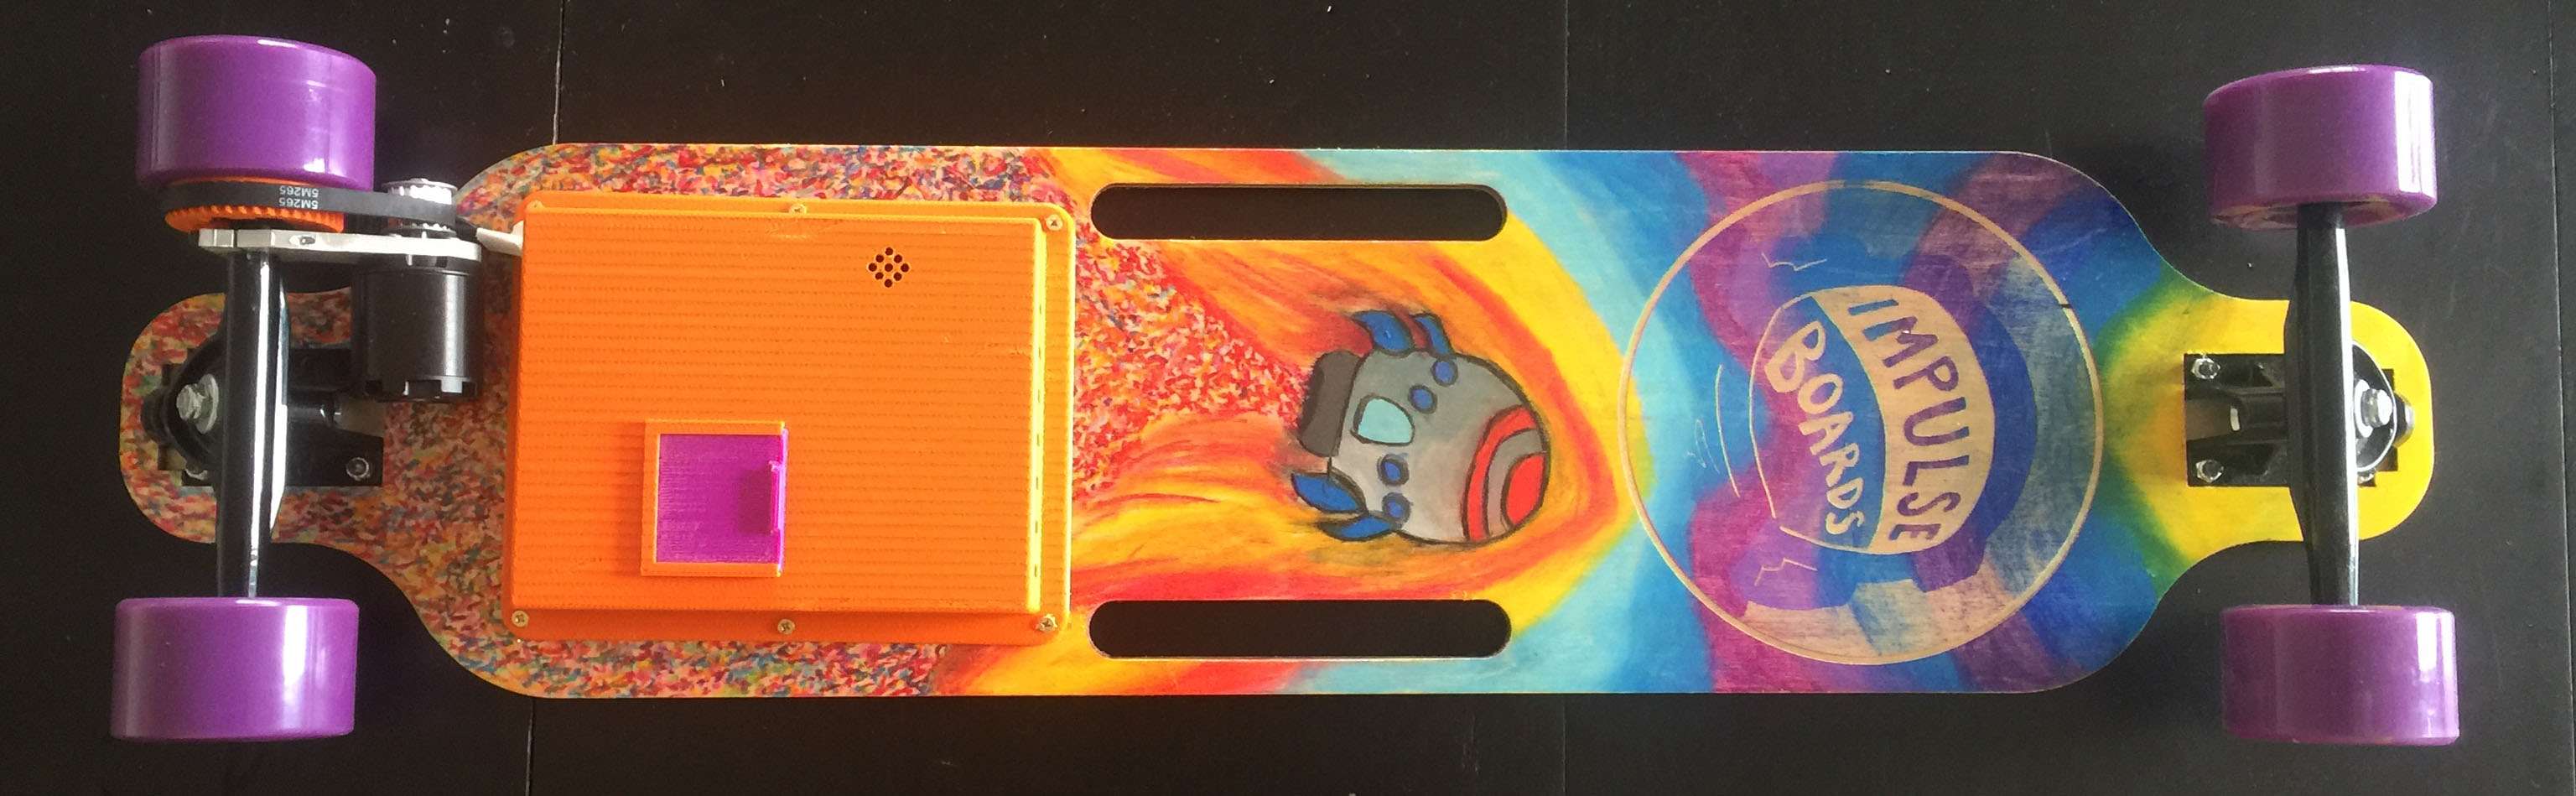
My buddy Sepehr and I designed an electric longboard to improve upon those currently on the market. The board can reach 23mi/hr (flat ground) with a battery life of roughly 8 hours. We designed everything from the deck, to enclosures, motor mount, and more (shout out to Brent Yi for designing the wheel-mounted gear). Electronics are mostly off the shelf. For manufacturing, the motor mount is made with the help of the Omax Waterjet and a manual mill, and enclosures are taken care of with the Dimension 1200 3D printer.
Berkeley's sprawling campus makes it hard to get end-to-end in the time we have between classes. Our skateboards work pretty well going one way, but if we have an uphill commute, we are in trouble. On top of this, all the electric boards at the time were extremely expensive, and so we decided to make our own. Below are some more details about the project.

Deck
The decision to design and build our own deck was made to help keep costs down. The cost per deck is less than $10. It is made from four eighth inch Birch wood panels. Three are cut along the grain and one is cut against the grain in order to achieve the desired level of flex.
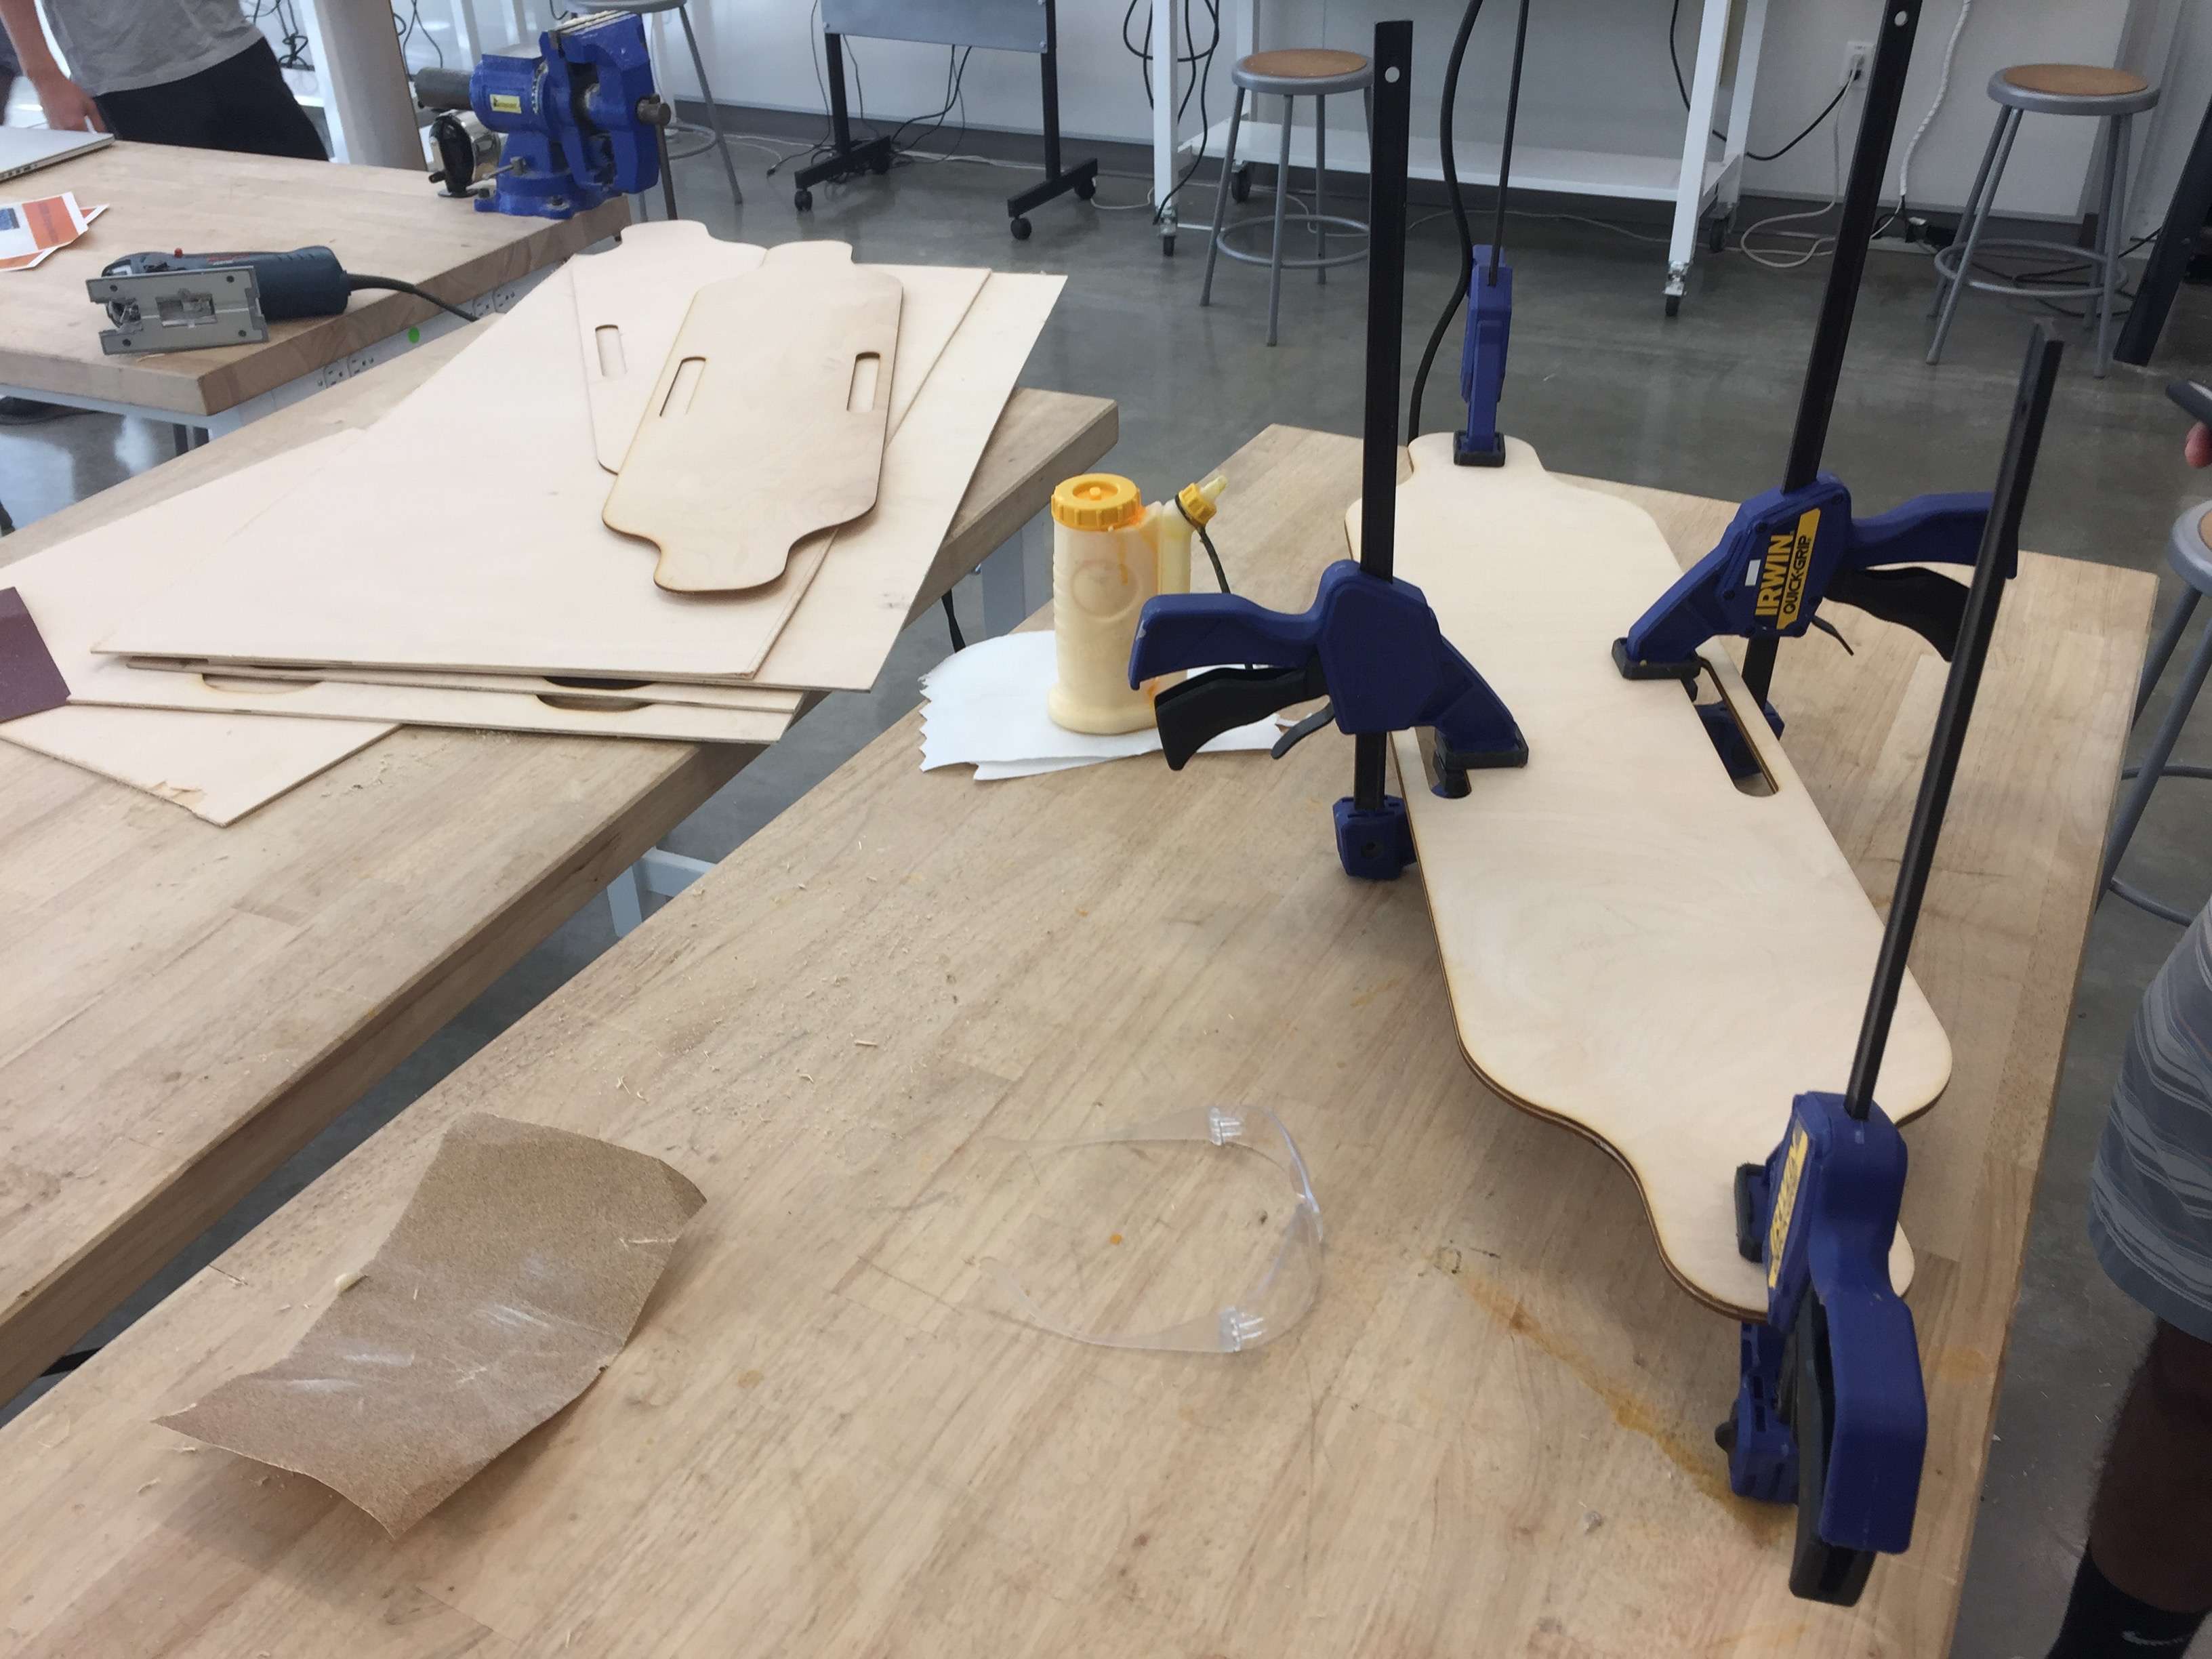
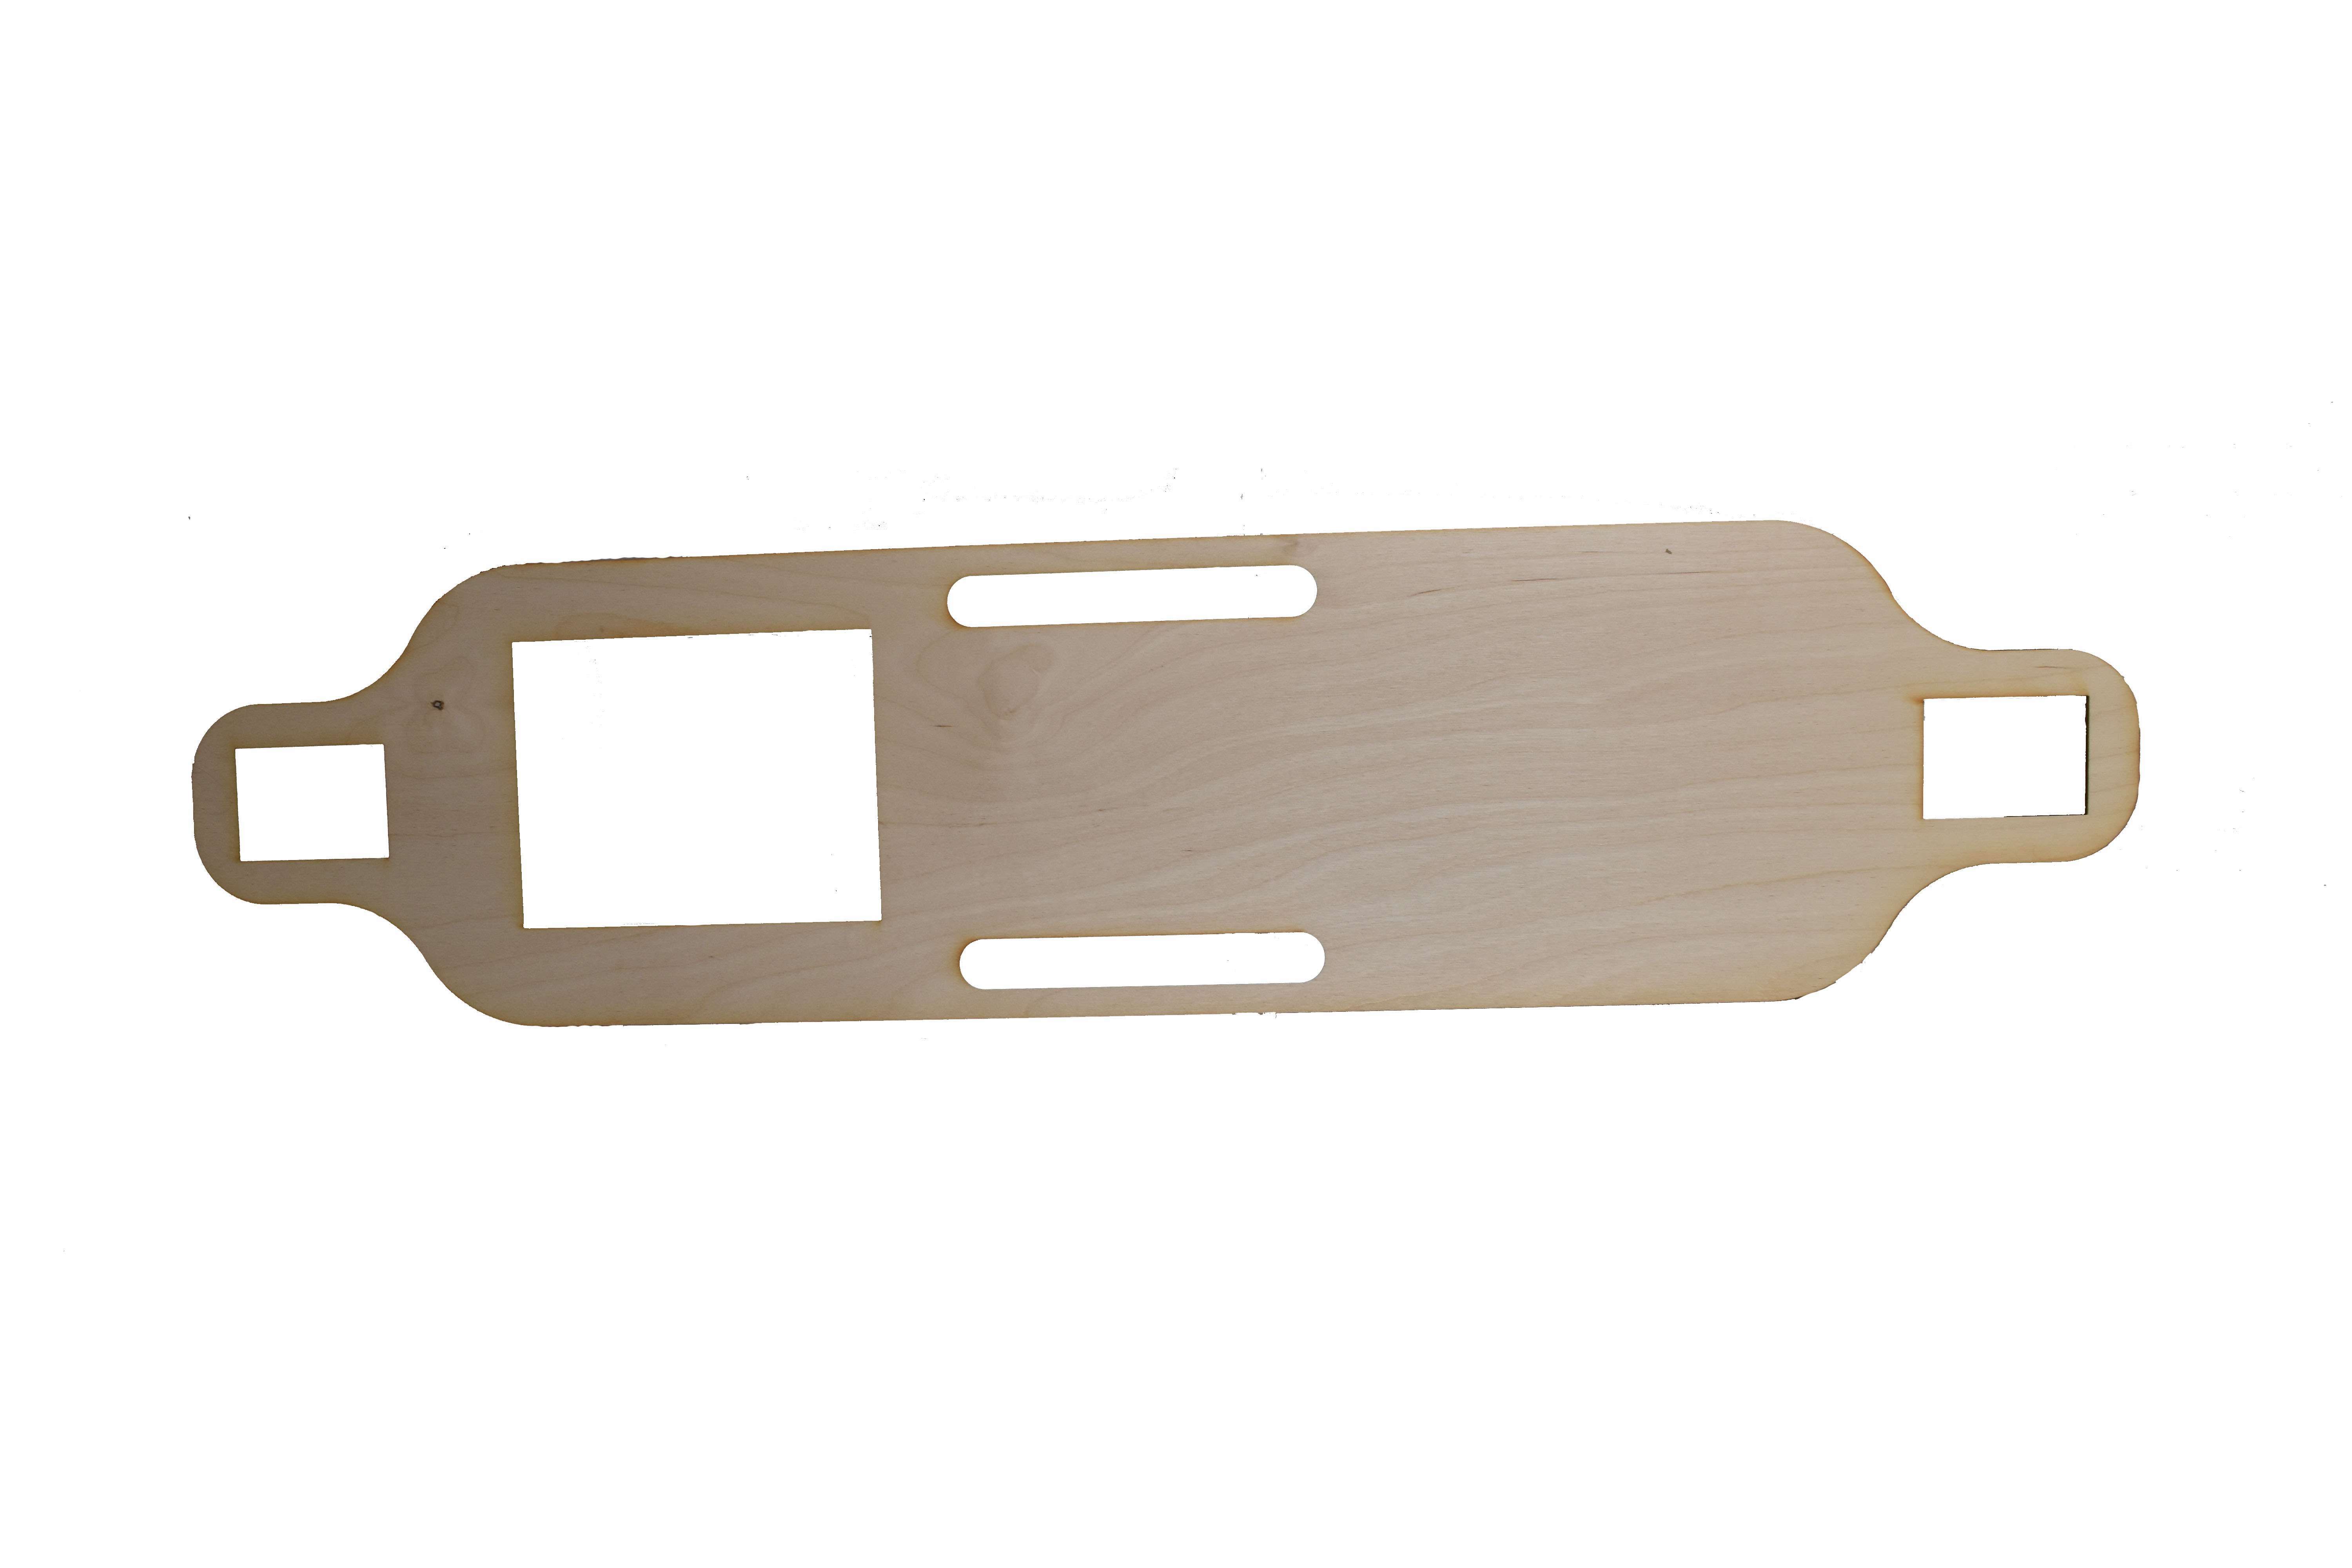
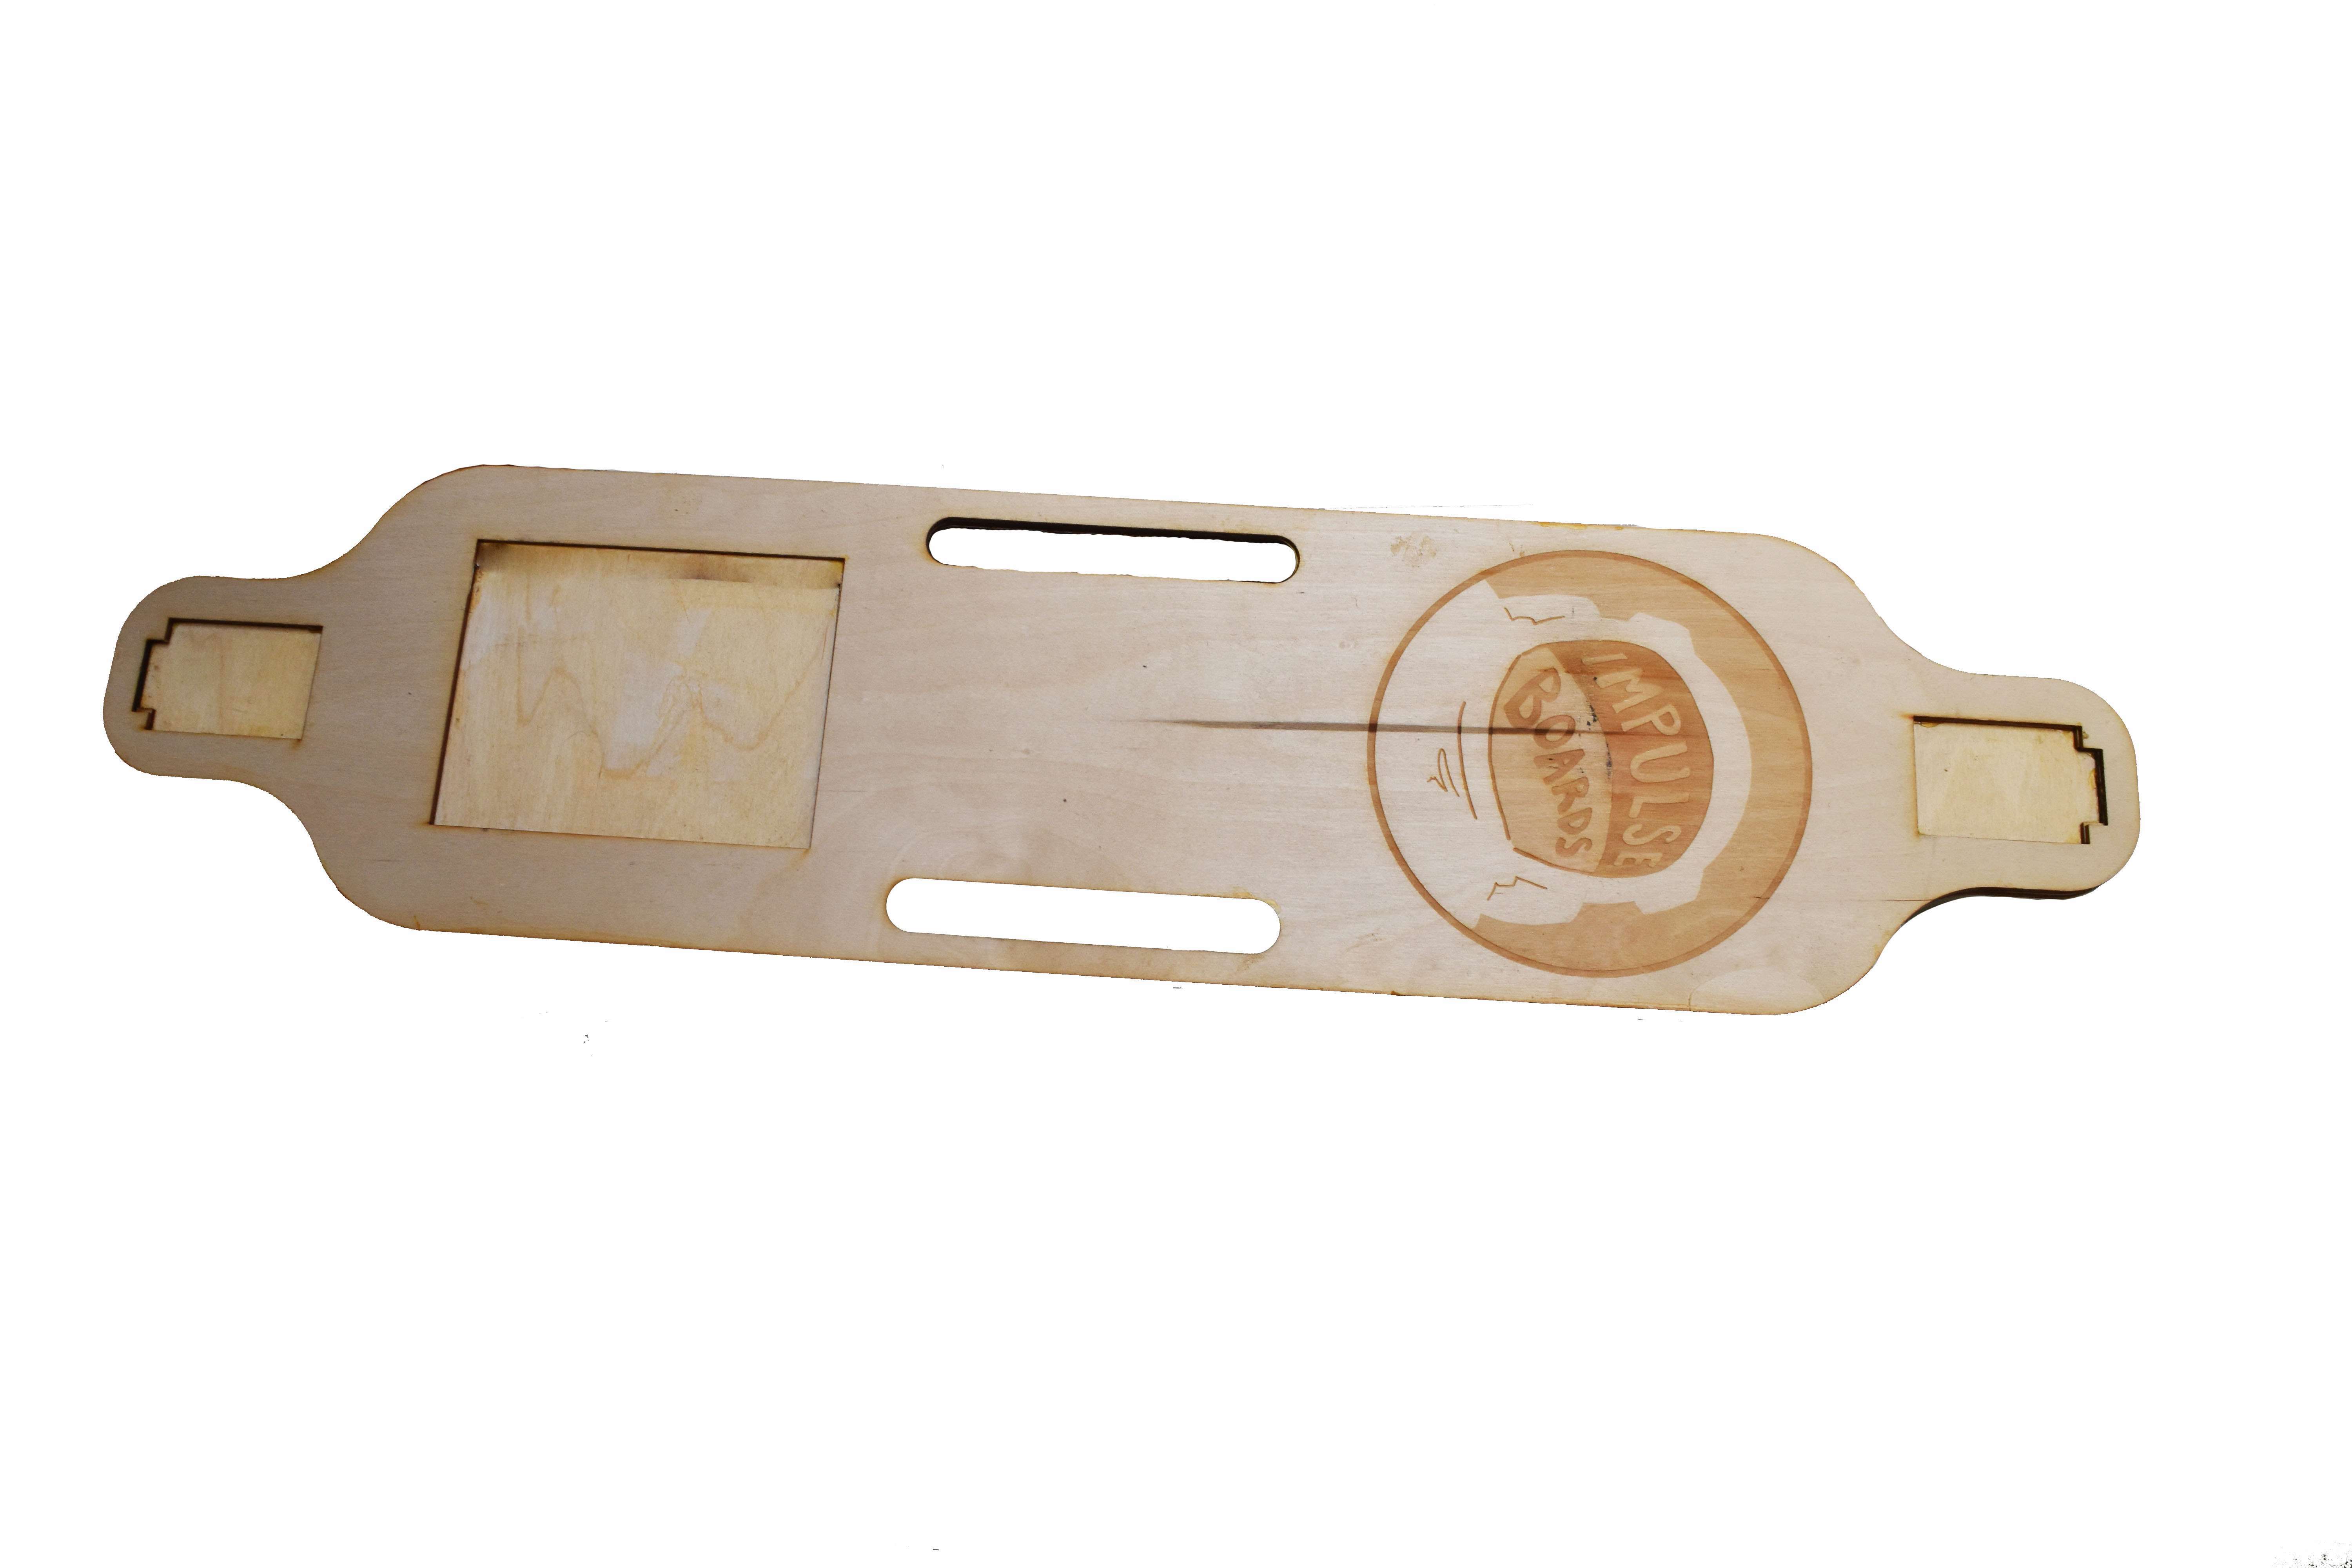
As pictured below, there are two different laser cut patterns. The holes are cut into two of the sheets in order to recess the trucks and the electronics into the board to keep the board low to the ground, the electronics safe and to give the board a sleek look. Additionally, handles on the side allow the board to be easily carried. The complete deck, with the Impulse Boards logo etched into it is pictured in the center.

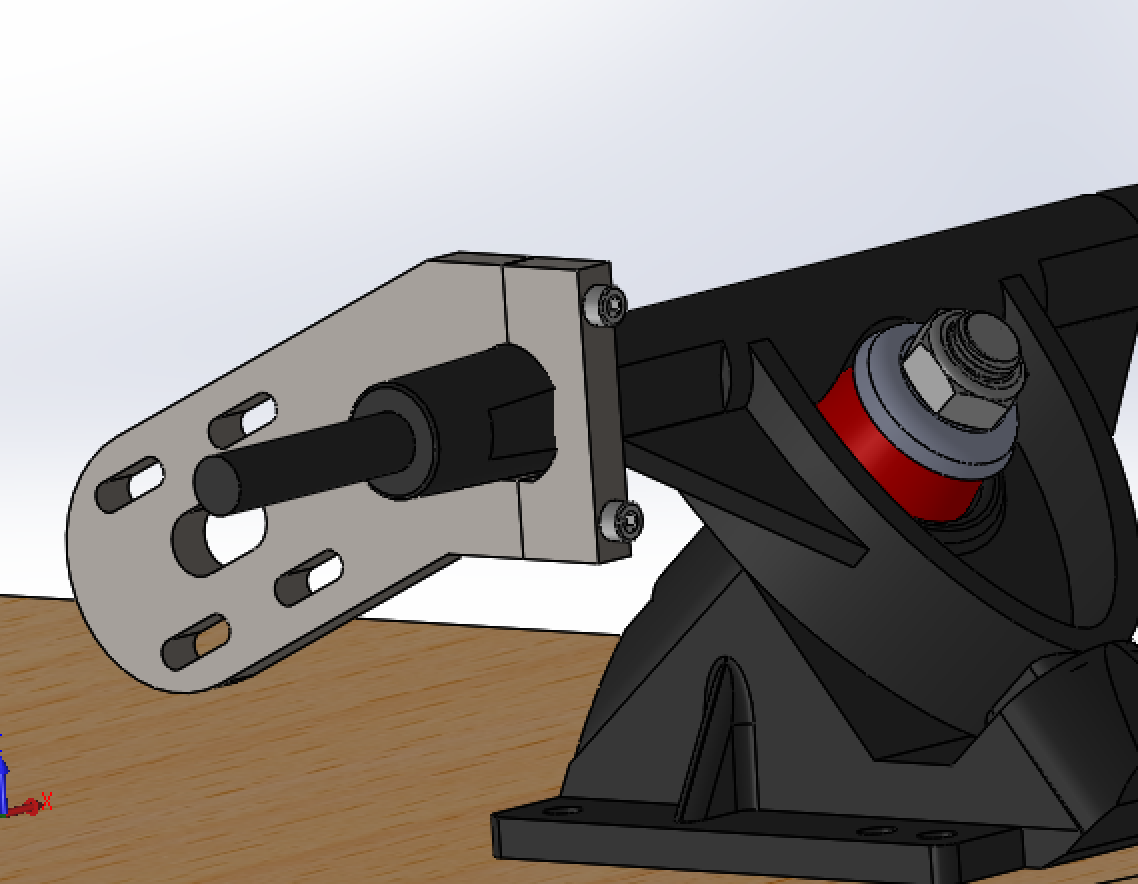
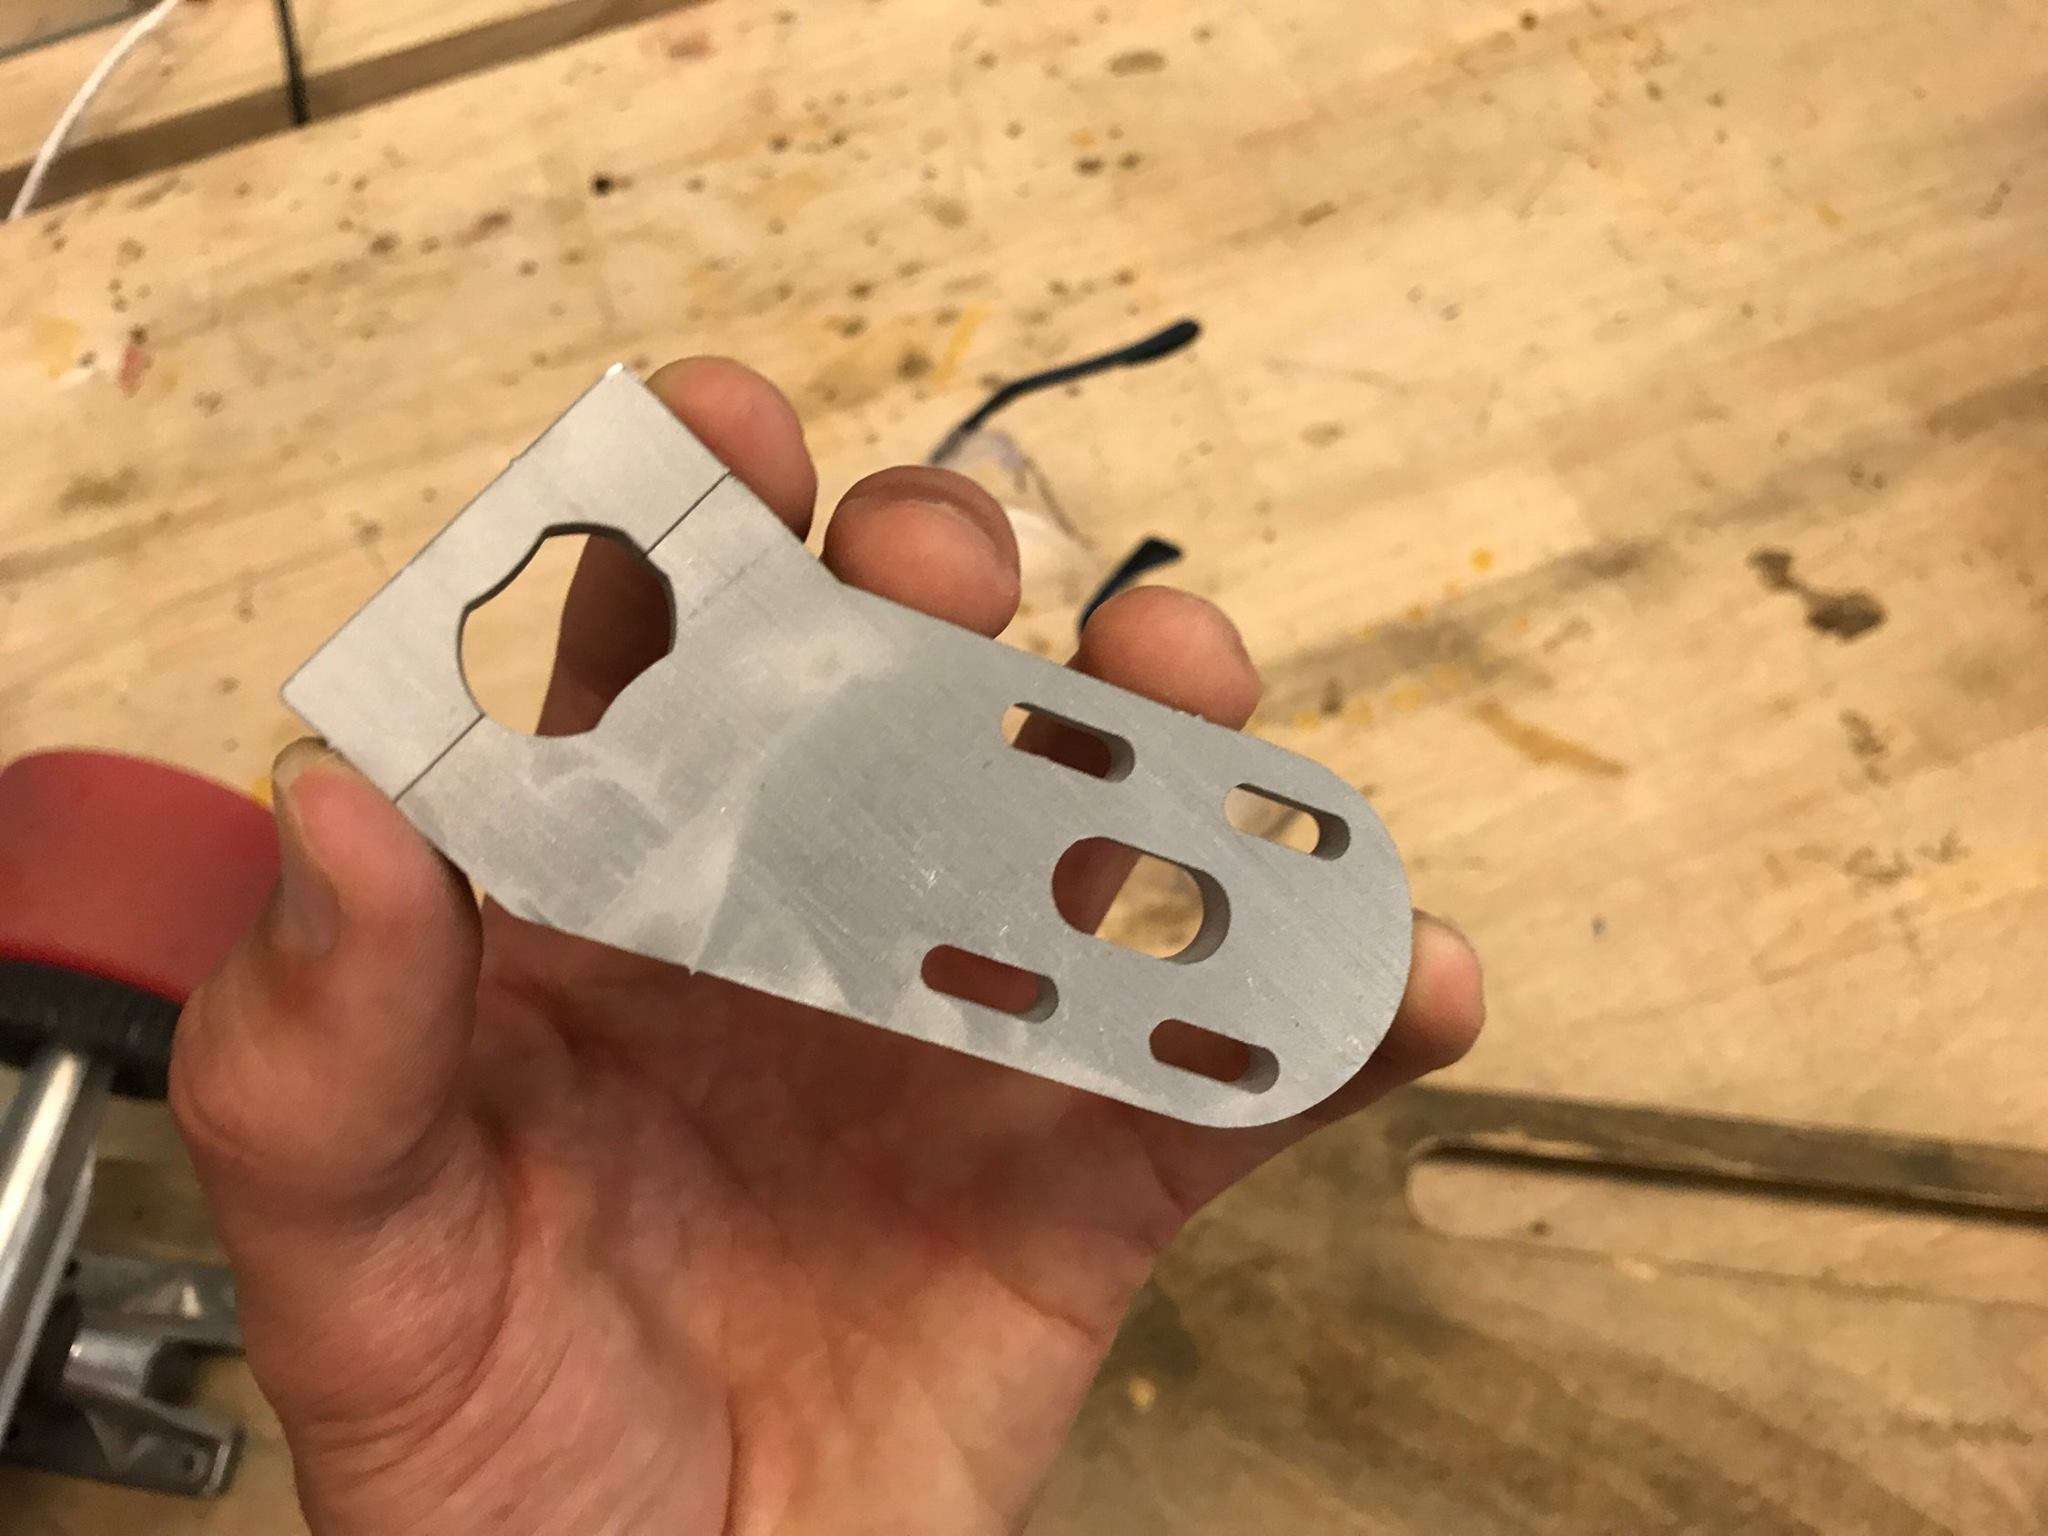
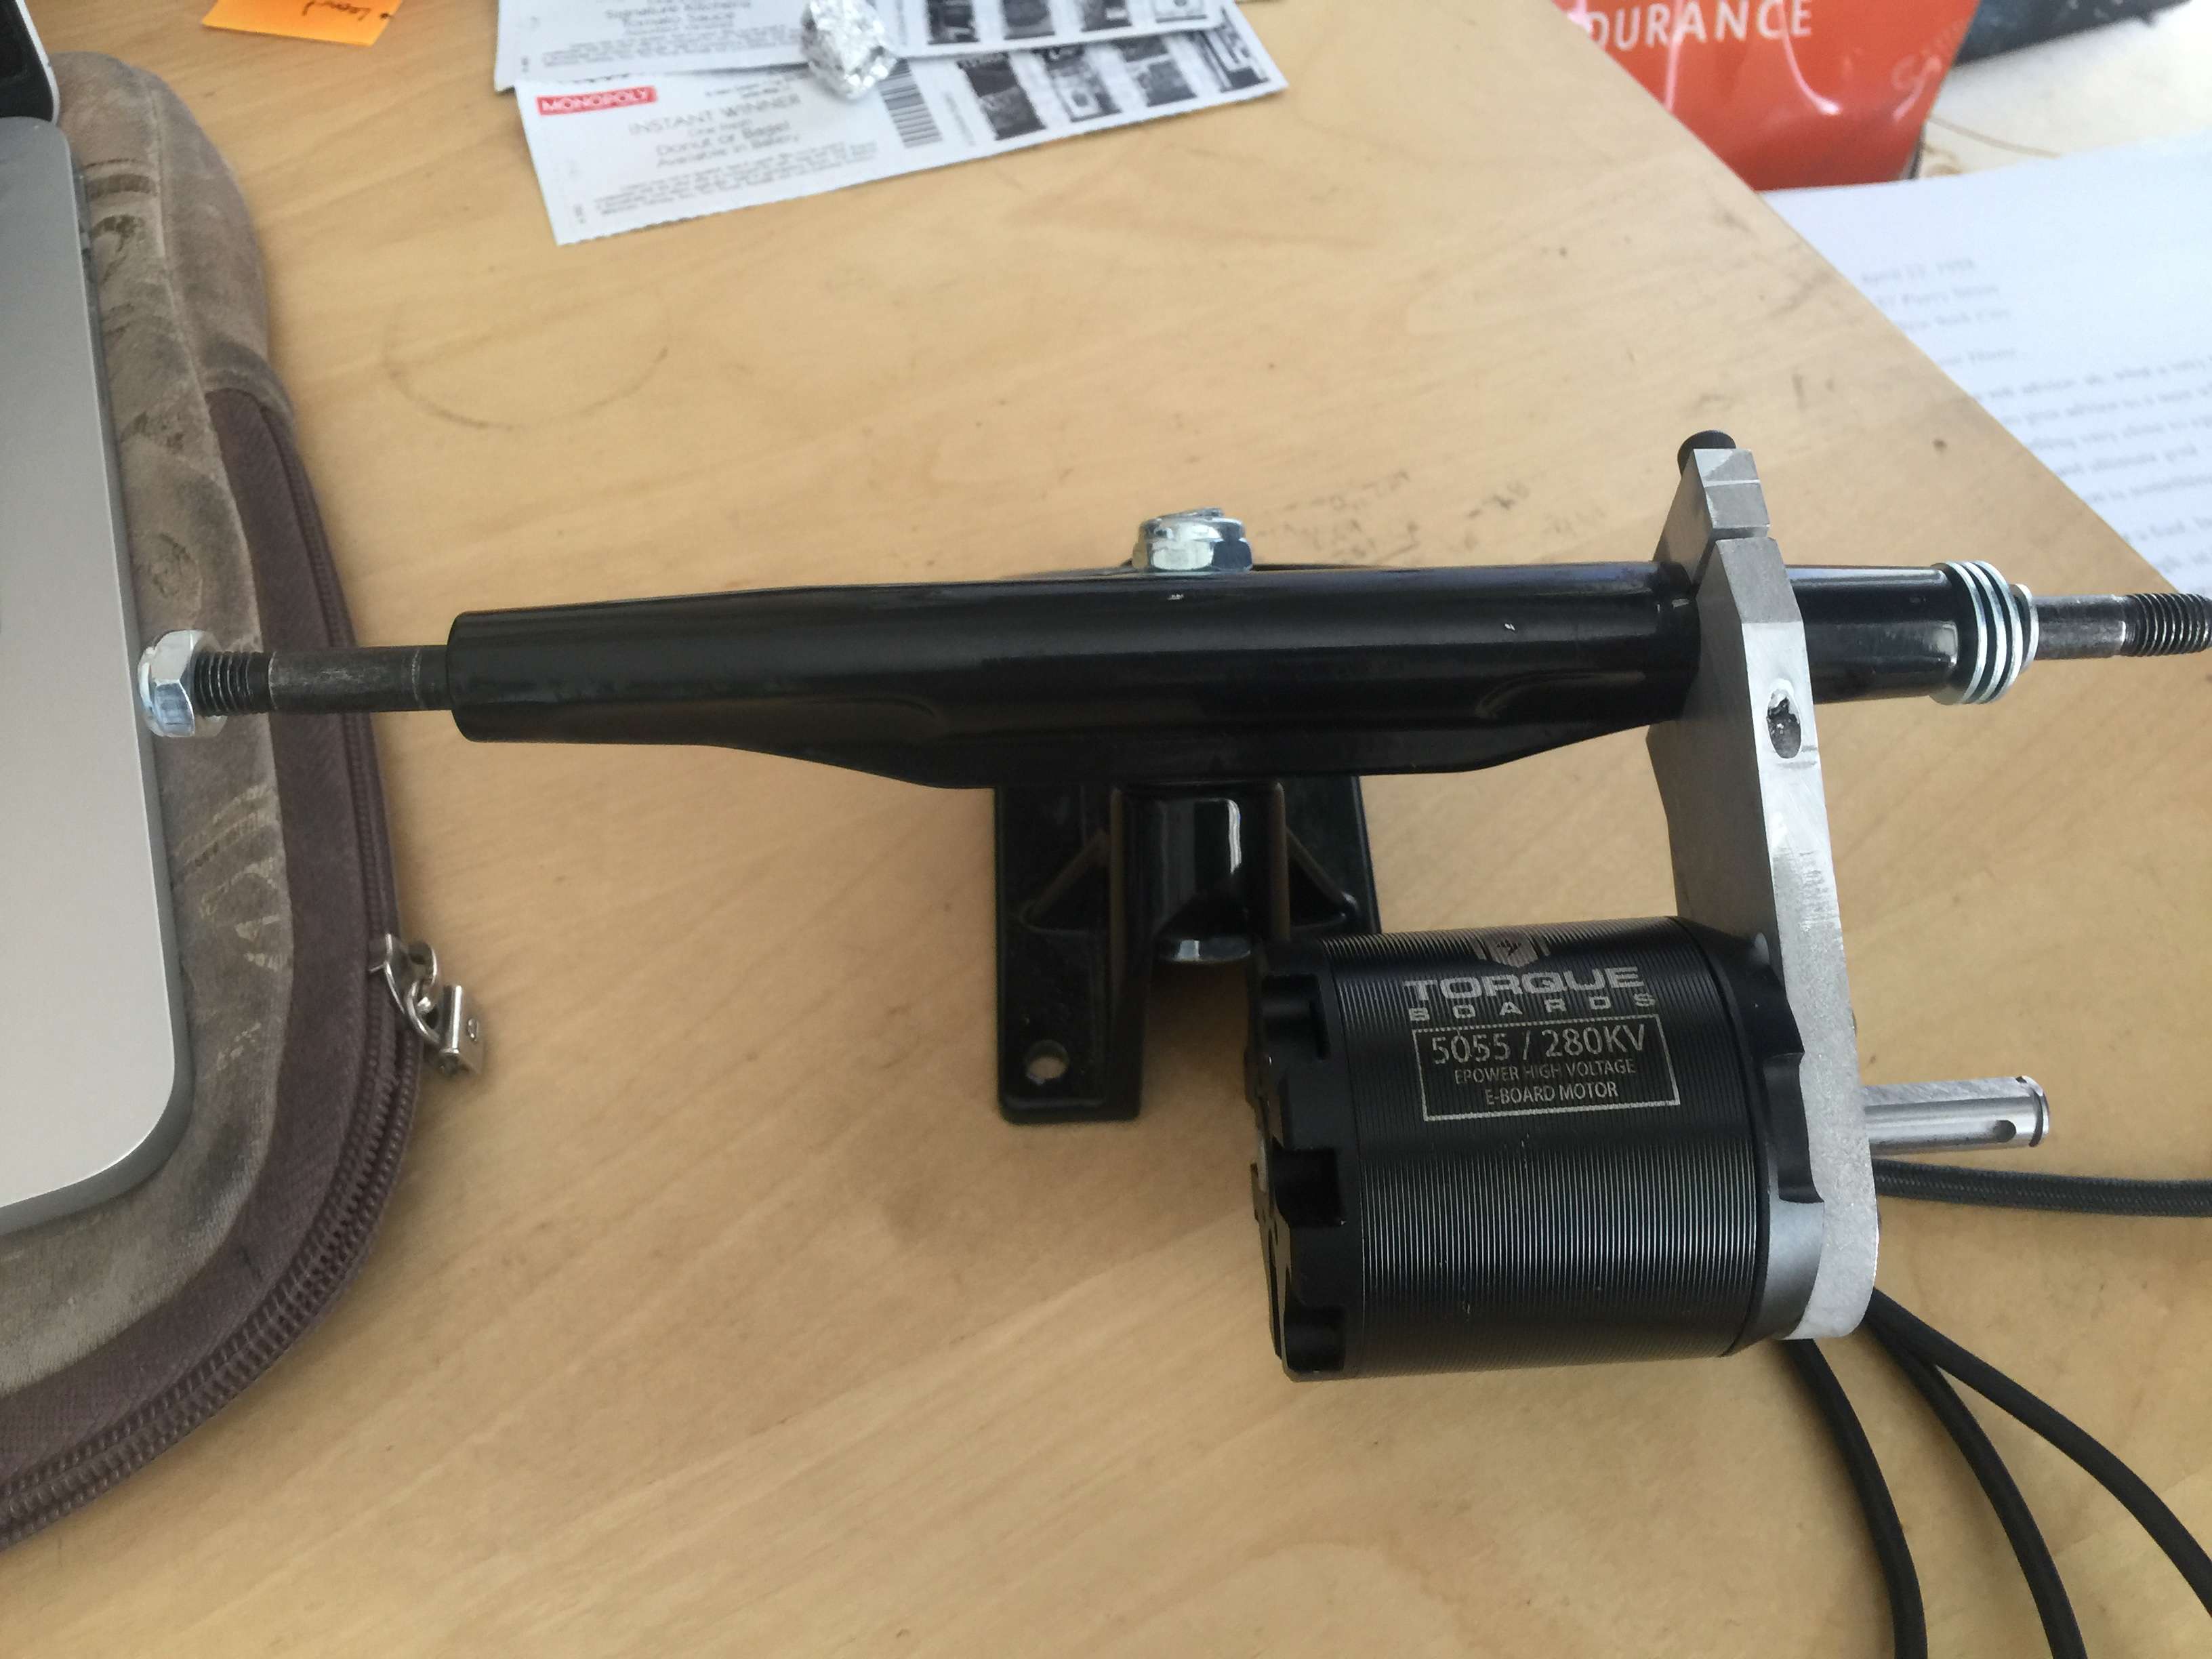
Motor Mount
Designing the motor mount is one of the most challenging aspects to this project. The purpose of the mount is to securely fasten the motor to the trucks. The mount is made with quarter inch steel sheet metal and is manufactured using the OMAX waterjet. I then tapped the thread/straight tap on the manual mill.
The mount is comprised of two parts. One component has slots for the motor to fasten to. The slots are there so that the belt can be tensioned and the motor placement can be tweaked if needed. The other component is a small piece used to fasten around the profile of the trucks.
The mount pieces are designed to fit snugly around the unique shape of the trucks, and then high strength steel bolts are used to fasten the mount securely to the trucks. Pictured below are screenshots from the CAD models of the motor mount interacting with the trucks.

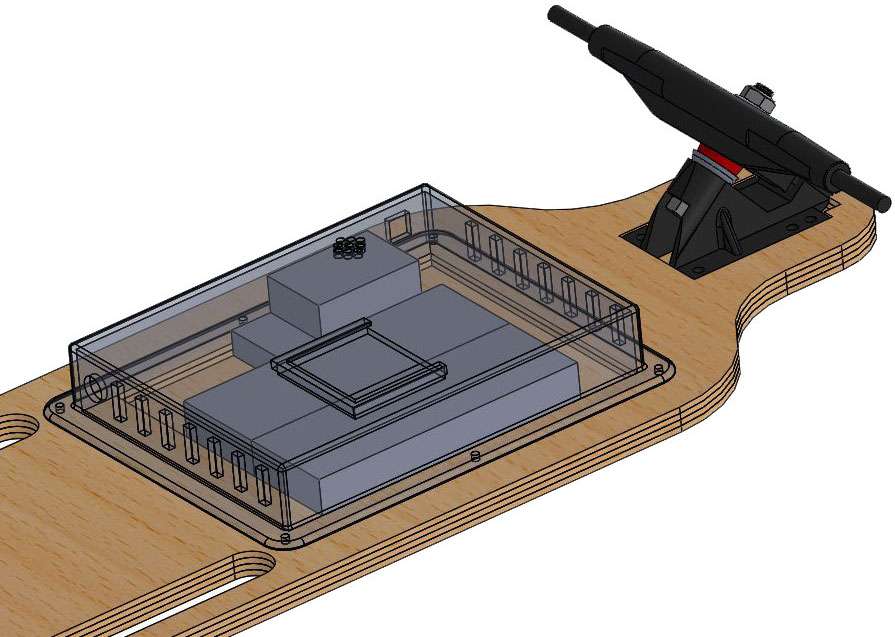
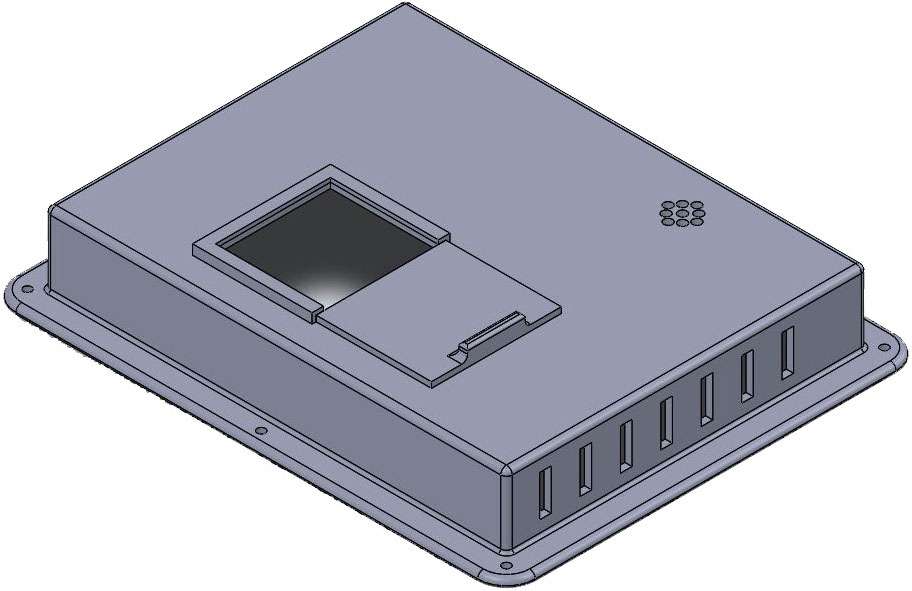
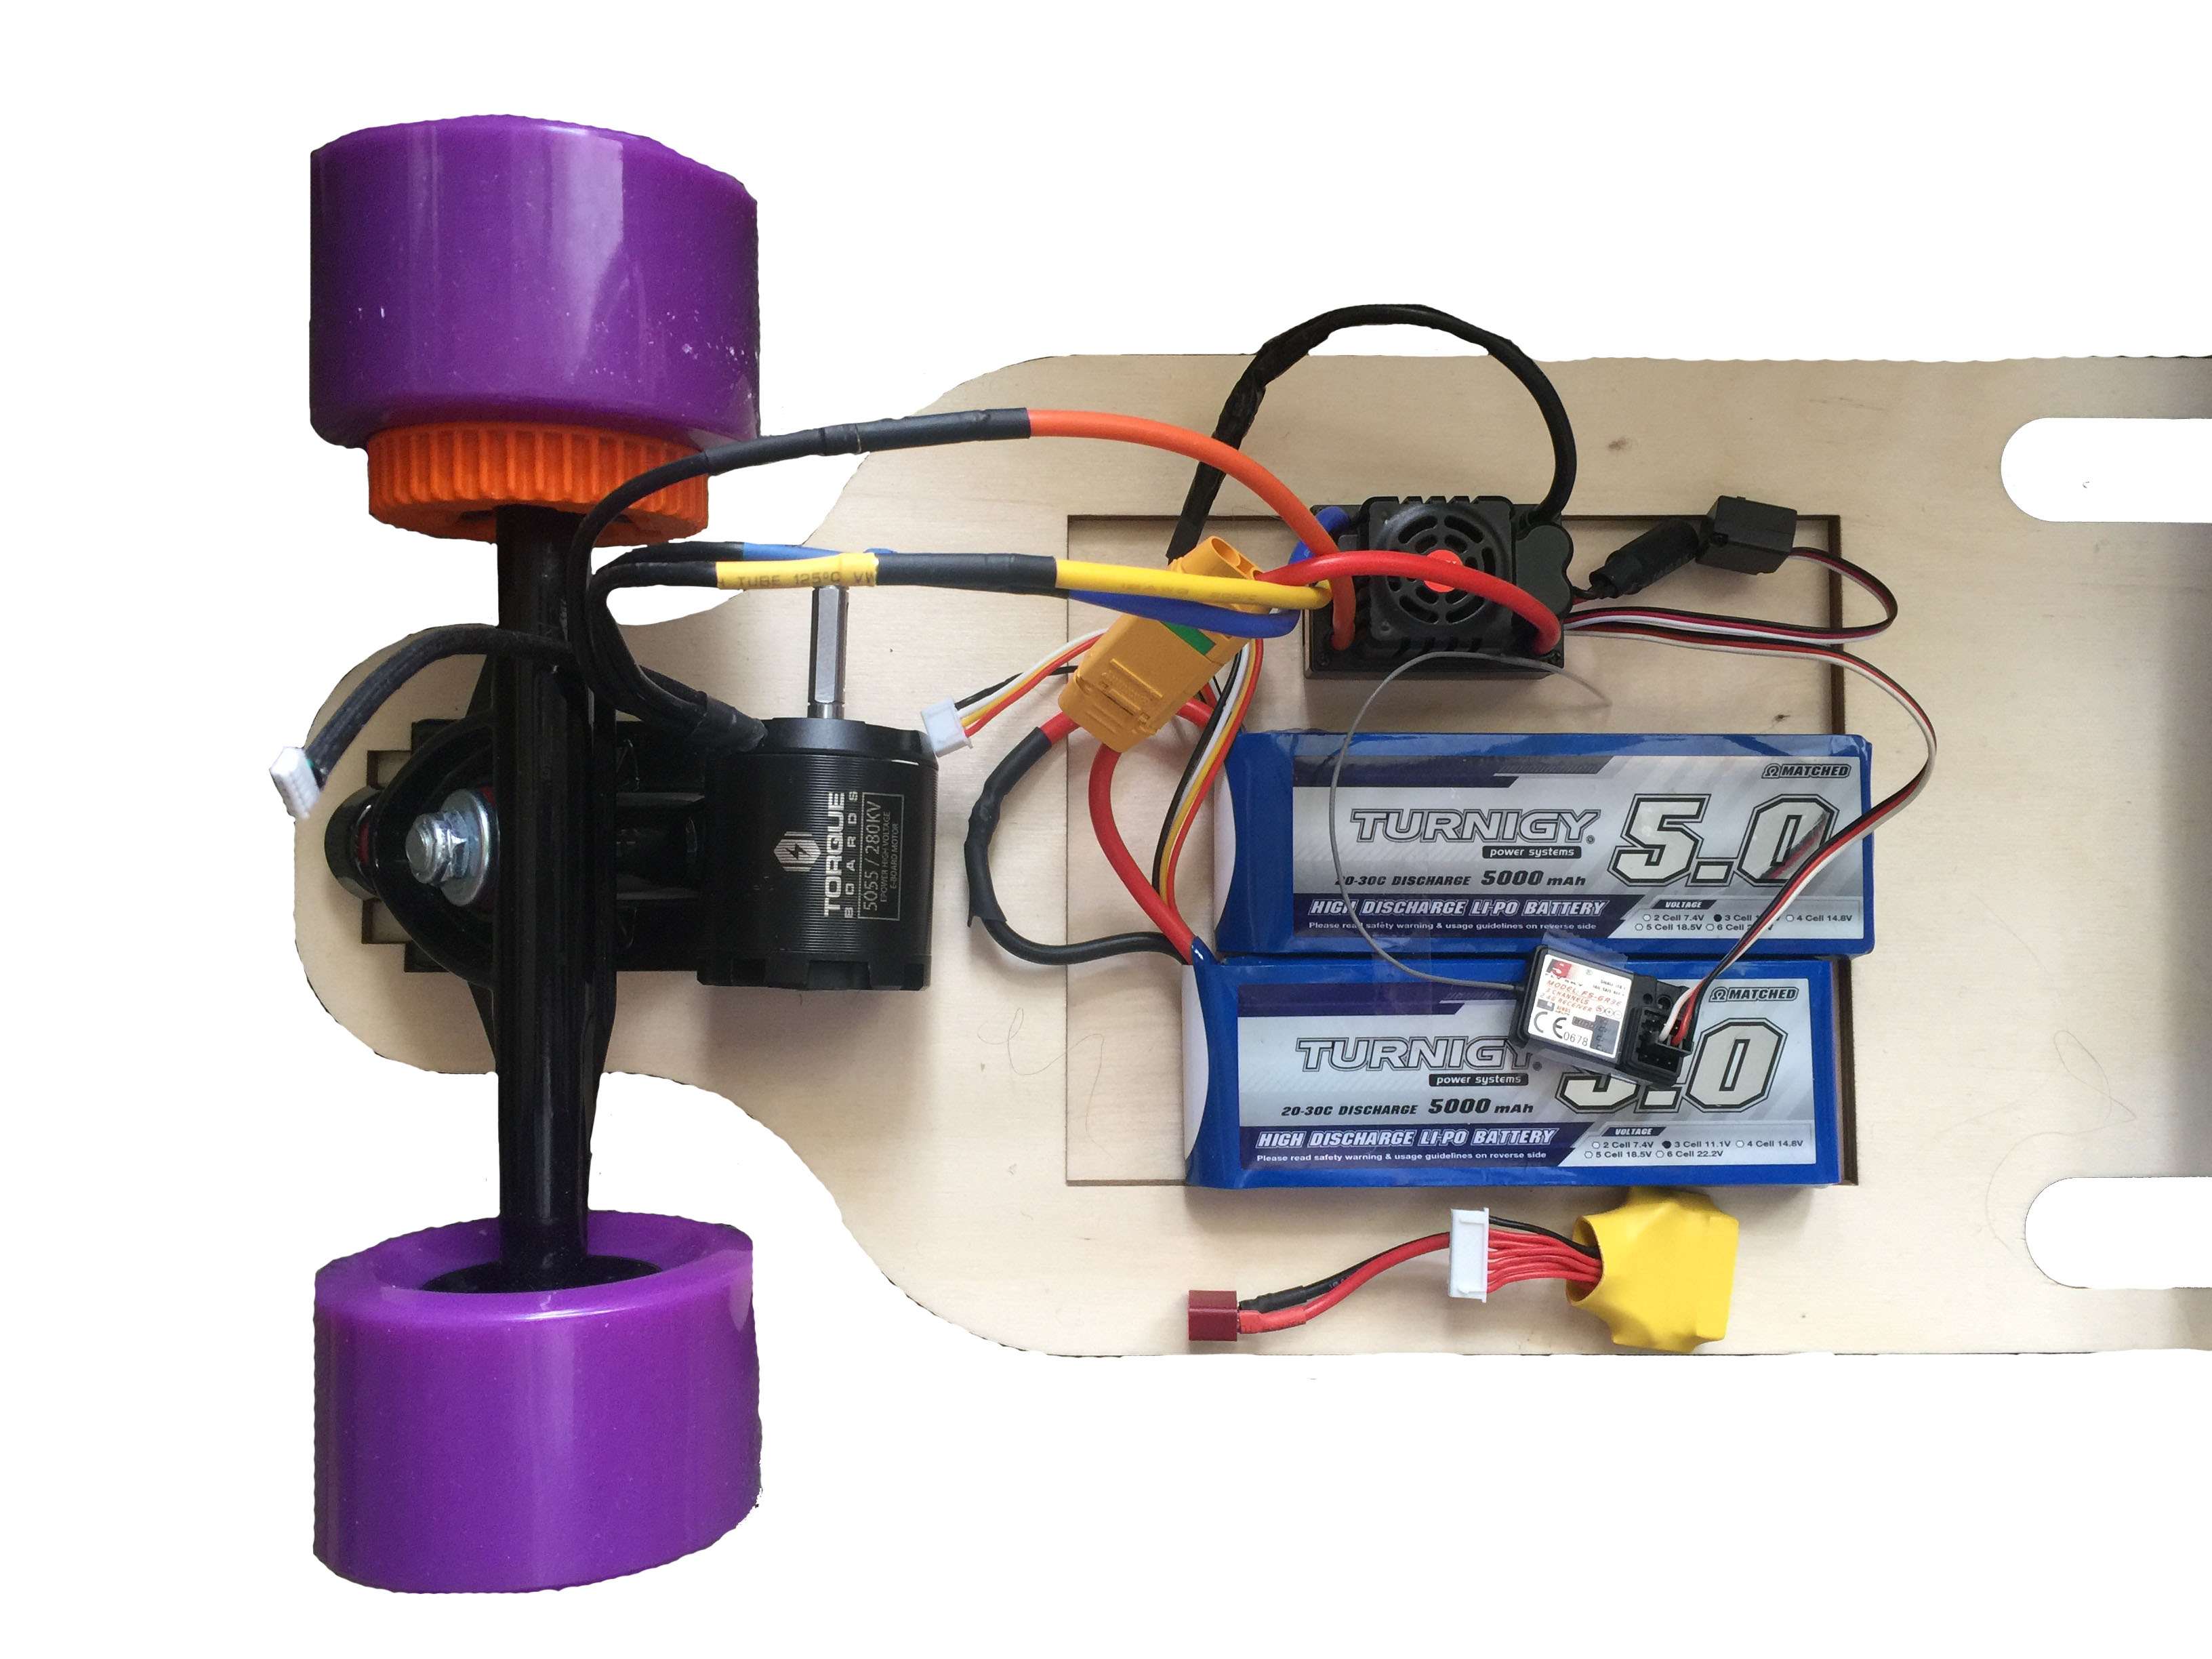
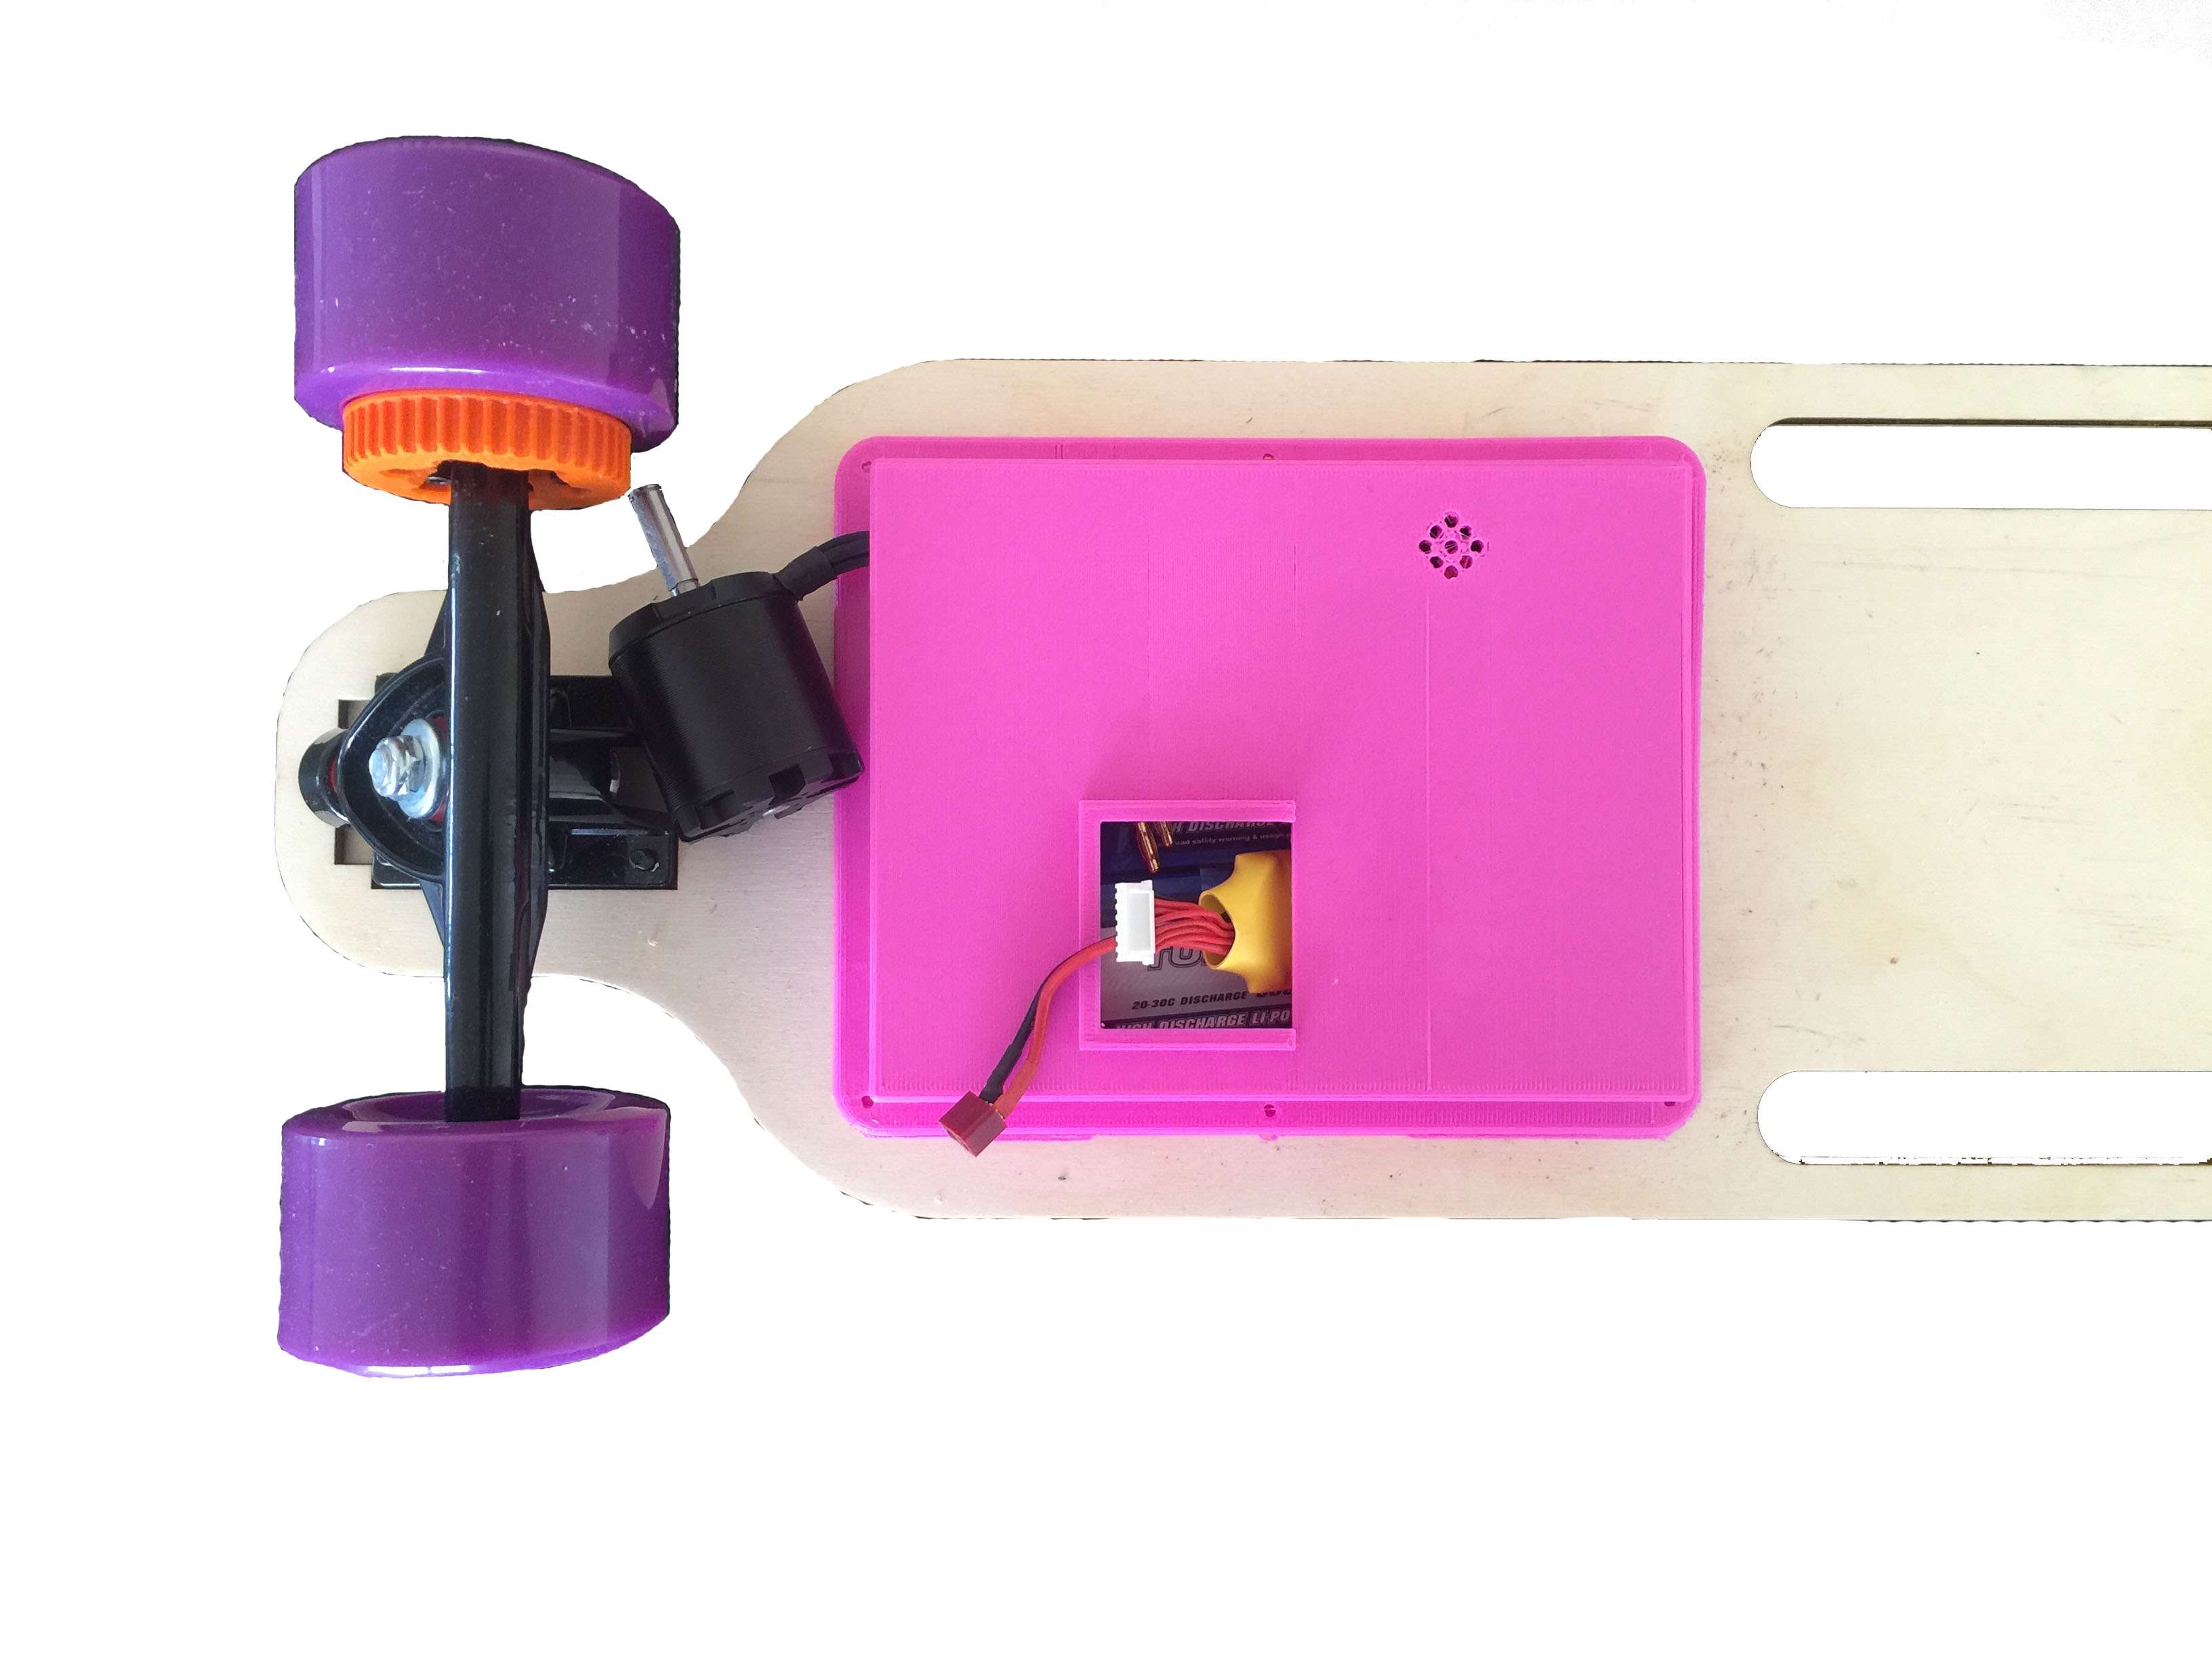
Electronics and Housing
The electronics are relatively straightforward. Theres 2 LiPo batteries hooked up to an ESC (the brain of the board), which has a wireless receiver that is configured for an RC controller. The ESC is connected to the motor, which ultimately is what turns the wheels. You can basically just follow this page.